This guide assumes the following:
- You have basic knowledge of the command line
- You have basic knowledge of git
- You have read Google’s guide to submitting patches
- You have AOKP source synced
Further reading:
Register and setup your username
First, you need to register at http://gerrit.aokp.co. Pick a username and remember it.
Alright, now on to the terminal commands
First, we need to set the username and email
git config --global review.gerrit.aokp.co.username <username you registered with>
git config --global review.gerrit.aokp.co.email <your email you registered with>
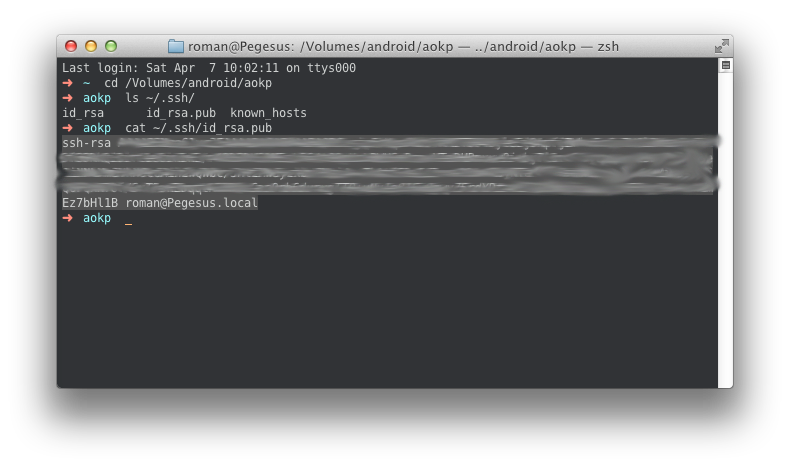
Next, we need to setup your SSH keys. First, test out if you have keys setup
![]()
You can see that I have keys already (the files id_rsa and id_rsa.pub indicate that you’ve already generated them). If you DO NOT see them continue reading. If you do see them, you can skip down.
Creating Keys
type this into your terminal:
ssh-keygen -t rsa -C "your @ email.com"
Checkout Github’s OS X and Linux guides on setting up your SSH keys.
Adding Keys to Gerrit
After you’ve created your keys, you basically need to copy the contents of your ~/.ssh/id_rsa.pub file. You can do this a couple ways. Either open up the file in a text editor and copy the contents, or run this terminal command
cat ~/.ssh/id_rsa.pub
Then select all the text it give you.
See how I got everything it outputted to the last character? Do that. Copy it. Go to Gerrit > Settings > SSH Public Keys. Click Add Key, then paste what you copied into the box. Click save. Done.
Making Changes to Upload
I’m going to assume you have all of the source synced from this point out.
So to show you guys how to use this, I’m going to just make some dummy changes to ROM Control.
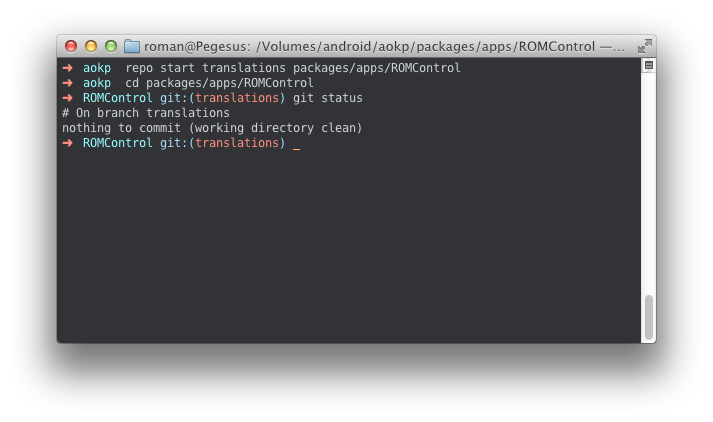
Let’s say I’m going to write some translations for ROM Control. First thing I need to do is start a repo project that we can upload to gerrit later.
Here’s how it works
repo start <BRANCH NAME> <Projects you wish to start this branch on>
Notice how when I go into ROMControl I’m already in the translations branch. You need to make sure your branch is clean, or doesn’t have any unwanted changes. Please please make your gerrit submissions AS CLEAN AS POSSIBLE.
Alright, now let’s assume you already made some changes and you haven’t run repo start yet.
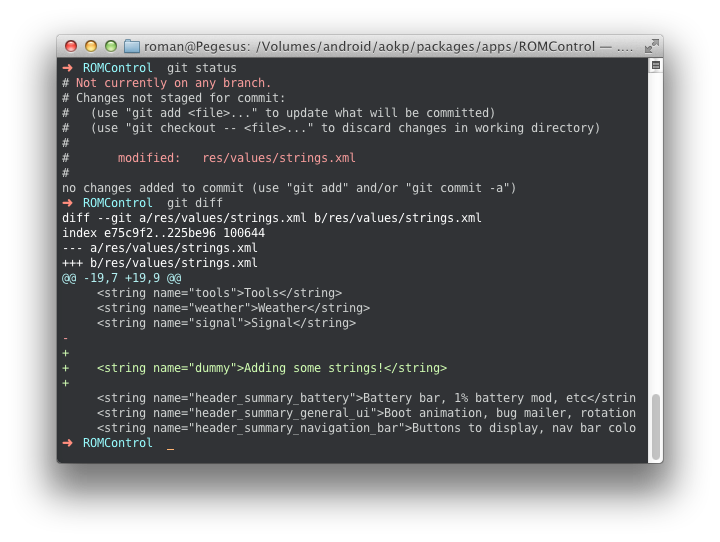
Notice it says I’m not on a branch, and when I typed in git status, it says I have changes. I’ve also ran git diff just to show you what’s different.
Now, before committing the changes, we need to run repo start again, just as we would before.
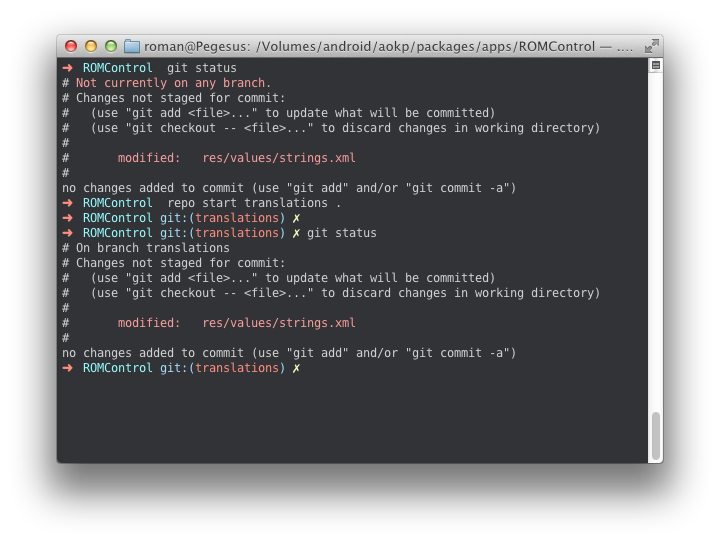
This time, I typed in git start translations . since I was already in the ROMControl directory, I just need to tell repo that the project is in this directory.
Alright. Now we’re ready to commit the change.
Committing to Github
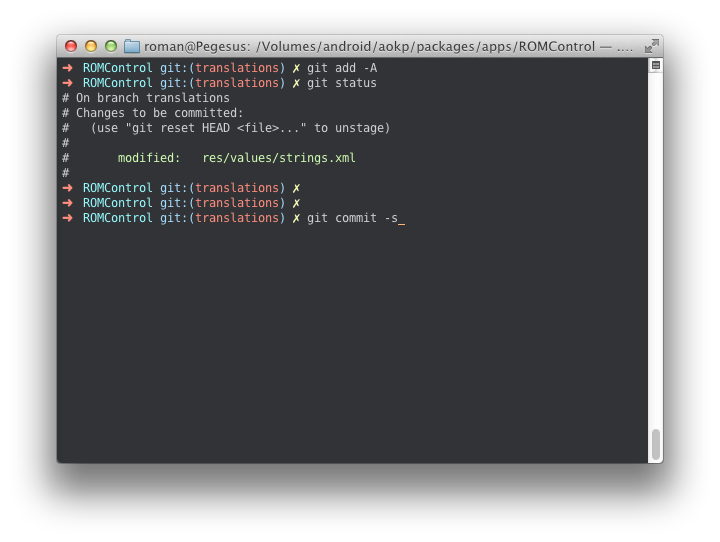
First, add the files to the commit that you wish to include.
git add -A
Running this command will include ALL modified files in the commit. You can check what files will be committed by running git status. Next, we need to commit.
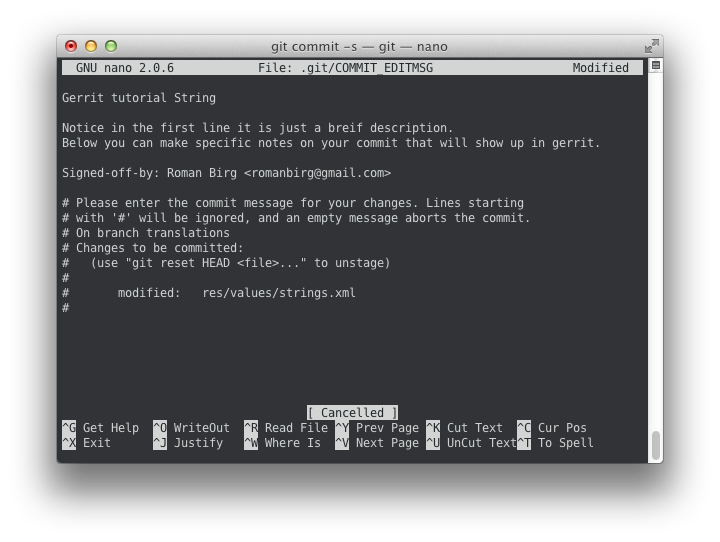
git commit -s
This will bring up the commit window allowing you to write a summary of your changes, followed by any details you wish to add. Your git commit command may bring up a different editor, that’s beyond the scope of this tutorial if you don’t know how to use it, but ask around and I’m sure people will help.
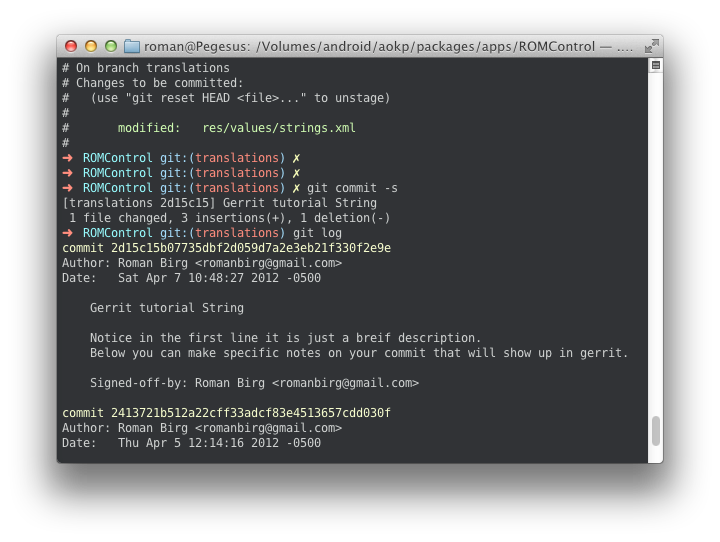
Once it’s been committed, you’ll be able to see the “commit successful” string and you’ll be able to see your change at the top when you type in git log
So we’ve committed the change to your local git repository. Now we need to upload it to gerrit.
repo upload .
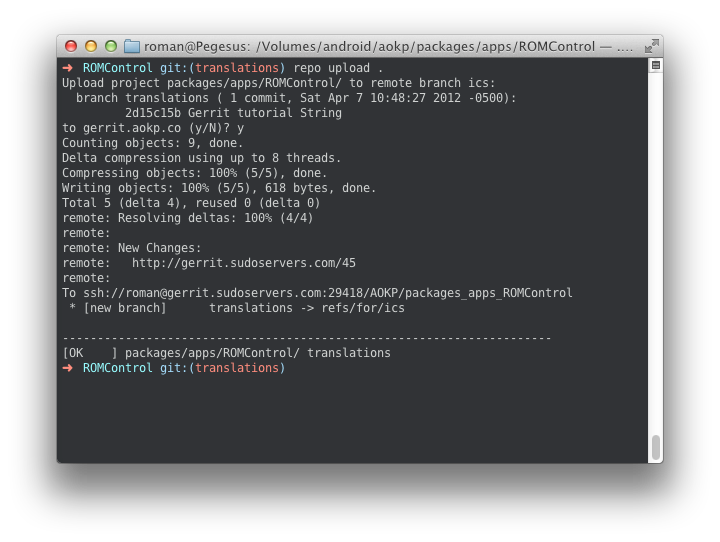
If it’s successful, you will see a message like shown above. And you’ll be able to see the commit on the gerrit site right after.
Making changes to your Gerrit commits
This is probably the most important part of the tutorial. Many times you need to make changes to your submission to fix a bug, or a typo or something. If you don’t do it the right way, it is easily possible to upload a whole new change instead of updating the one that already exists.
So first let me make some changes to my files that I want to include in this specific commit.
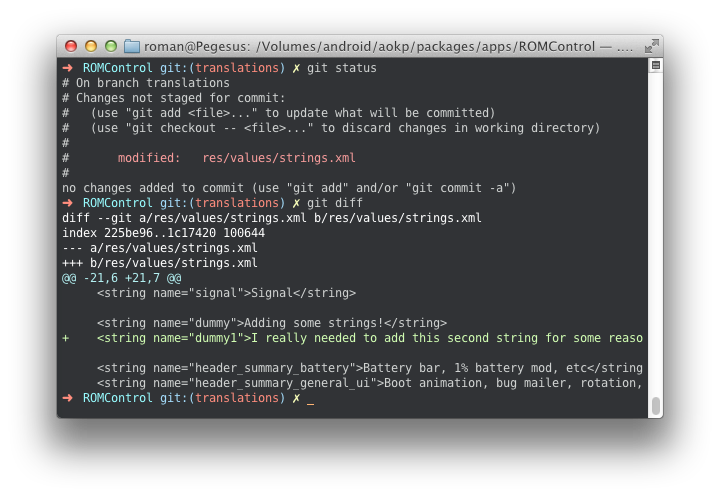
I’ve just added another line to my strings.xml file.
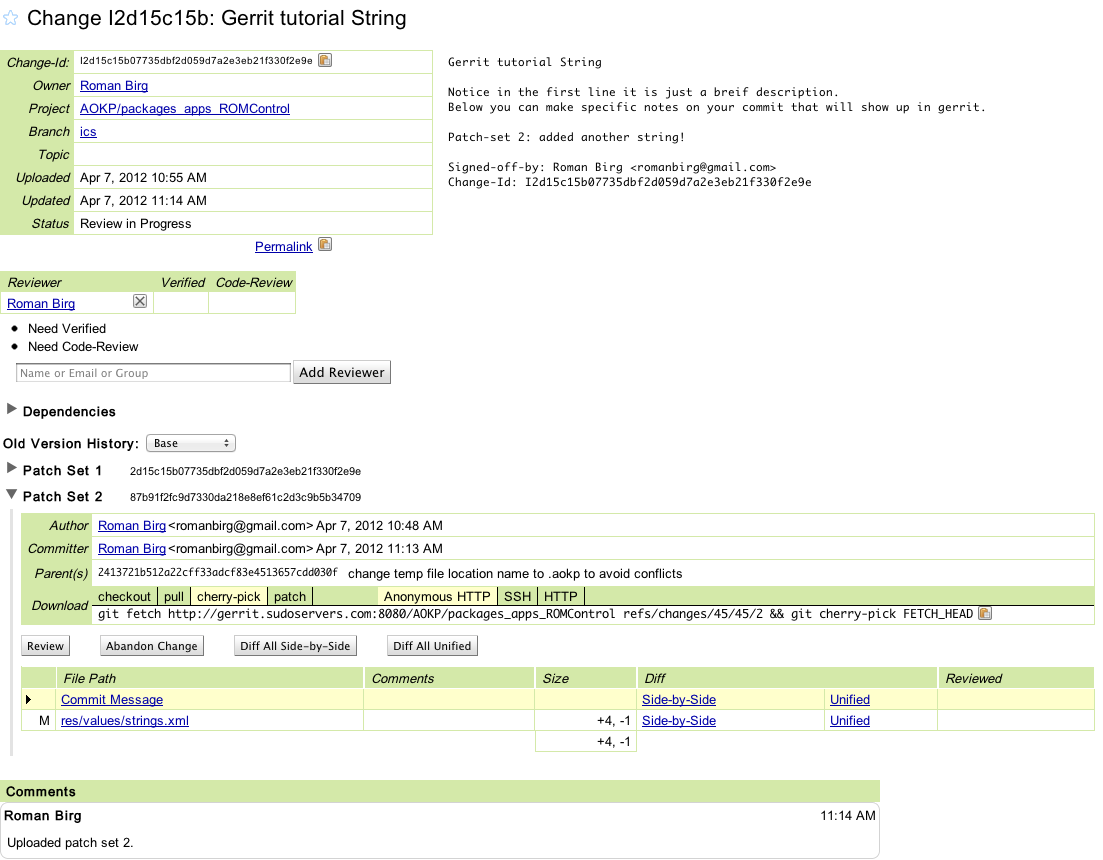
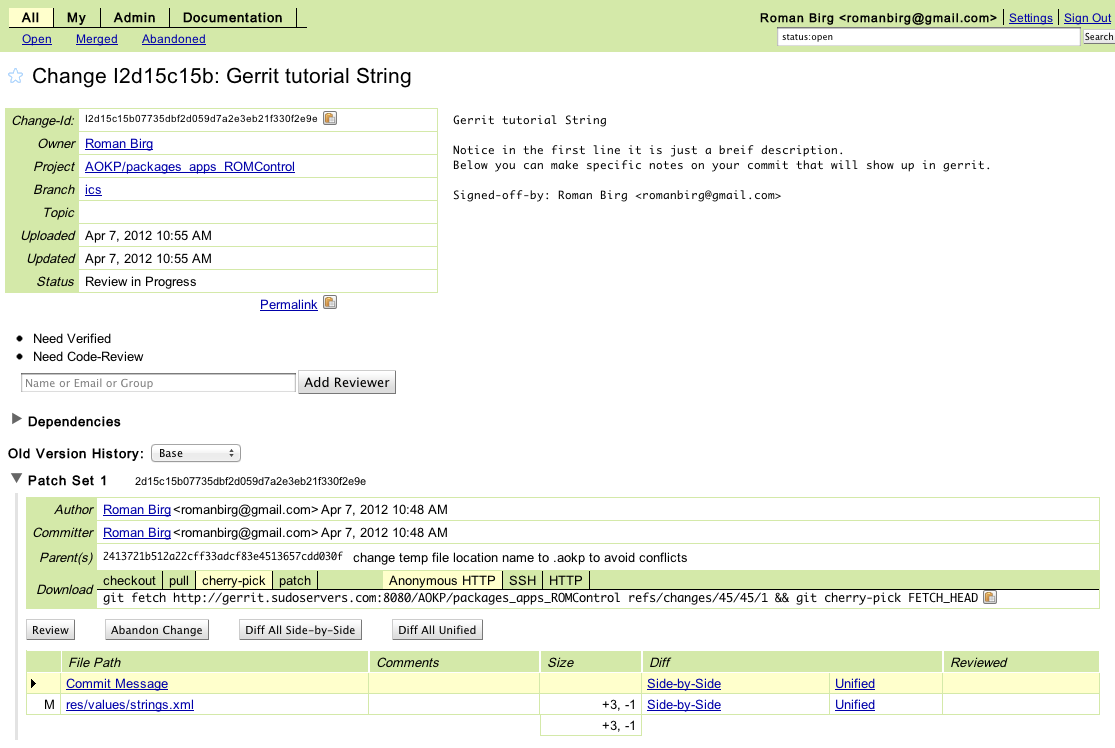
Be very careful here. We need to do a few things. First, so that gerrit will recognize we are changing a change already present in its system, we need to get the change id.

You can click on the change-id itself to copy it, or you can just click the little copy button on the right. That’s what I usually do. After clicking it, the following should be in your clipboard:
Change-Id: I2d15c15b07735dbf2d059d7a2e3eb21f330f2e9e
Back to the terminal/console now. We need to tell git which files we want changed. Type git status to see what’s happening and what’s added or not. Add your new changes as normal.
So now that we have the change ID, we need to AMEND our commit, not make a new one.
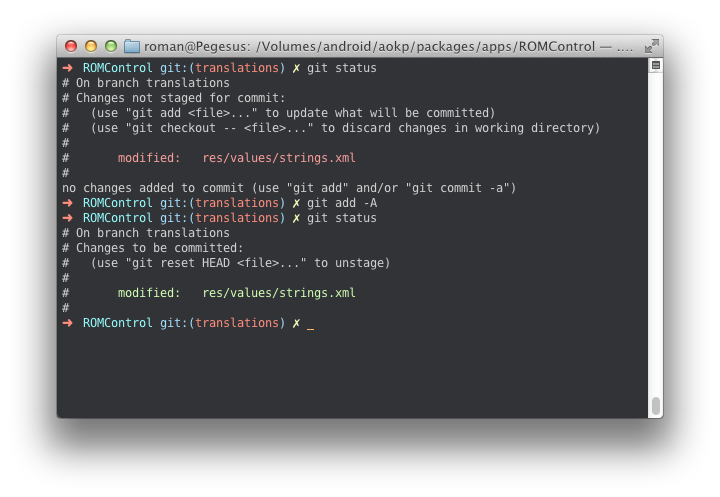
I just did a git add -A again. Ok. Now we’re ready to amend our previous commit.
git commit --amend
You should get the your previous commit message ready for modifying. We need to add that commit-id we previously got to the very BOTTOM of the commit message so that gerrit can properly parse it.
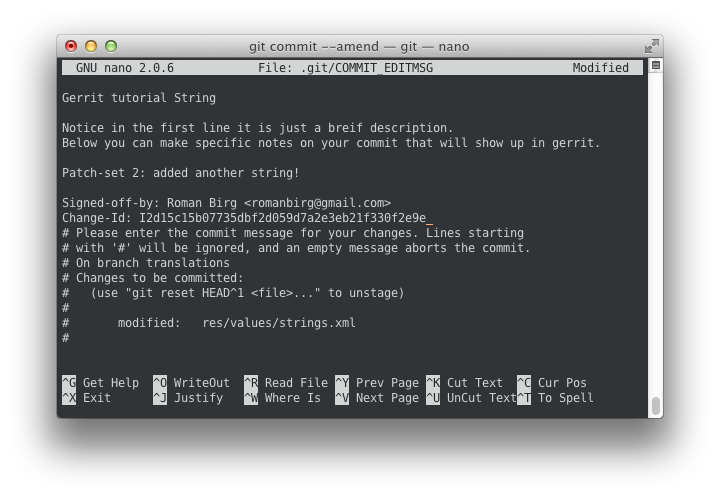
Notice how my Change-Id is at the VERY BOTTOM of the commit message, below my sign-off. Now save the commit message and we can repo upload again.
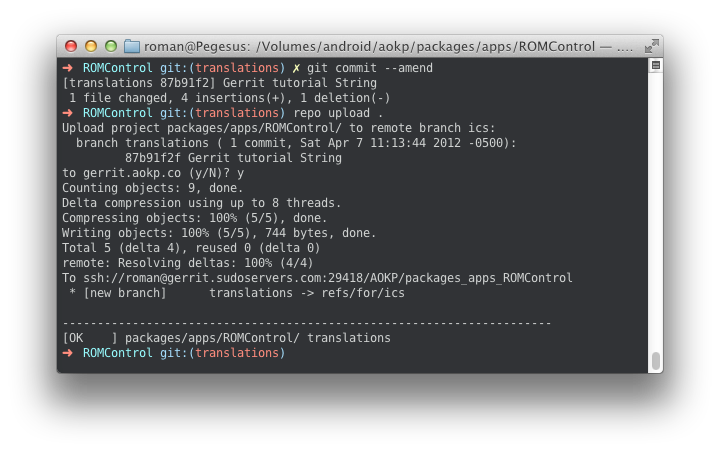
After uploading, your changes should be in THE SAME gerrit submission page. This is extremely important that you do it this way and not just by submitting another commit.